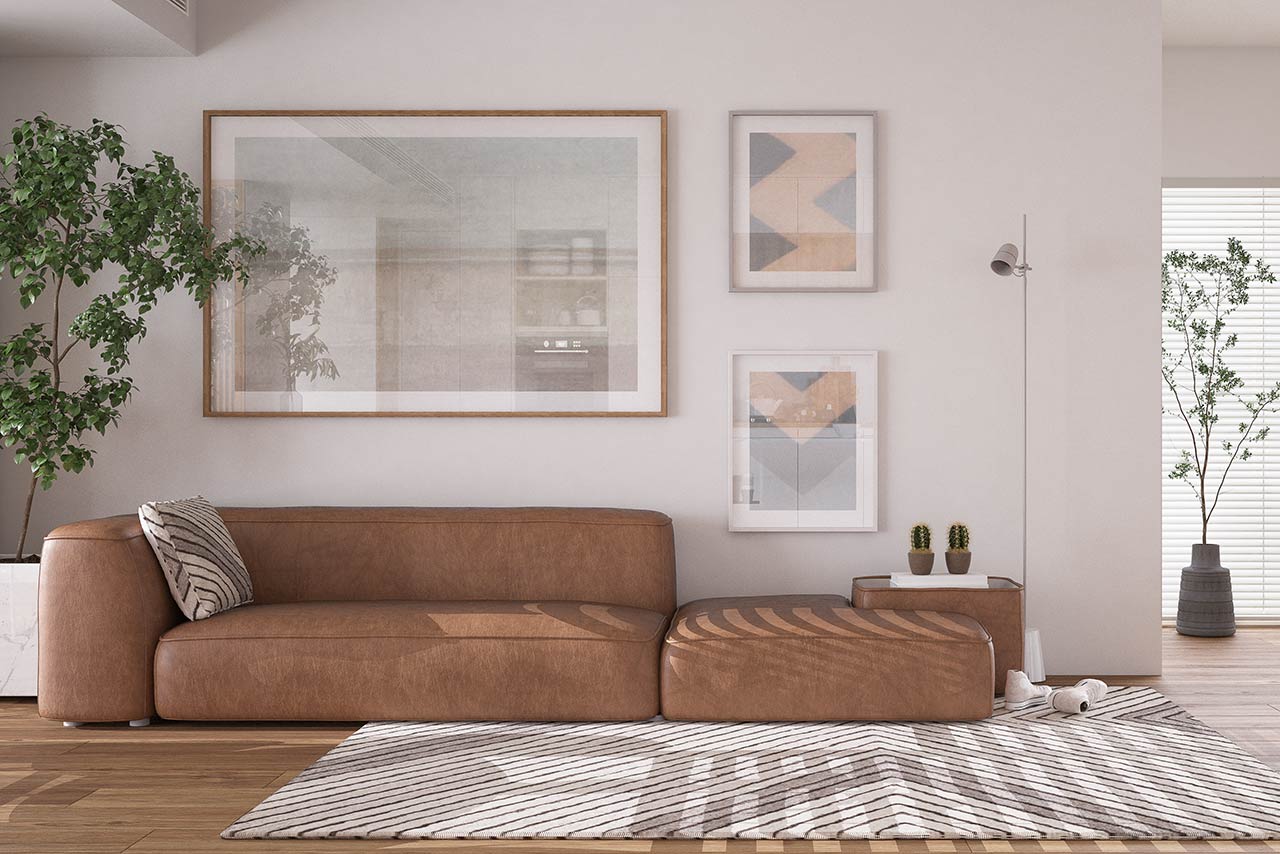
As much as you love your home, you look at it completely differently when a young person is around. Whether you’ve just had a baby or your sister is bringing her kids around for the holidays, you’ll instantly see all the dangers that lurk in your bathrooms, kitchen, and living areas. While there are numerous products on the market that will make childproofing your home easy, many of them are designed more for function than visual appeal.
It is possible to make your home safer without sacrificing your décor. Here are three small things you can do to keep your smaller visitors safe and sound without creating an eyesore.
Cordless Blinds
You may not realize it, but the cords on your window blinds pose a serious choking hazard for young people. Instead of running yourself in circles, trying to prevent such an injury, consider changing out all of your old window blinds for one of the many cordless options available on the market today. You can find cordless options in almost every type of blind you’d want for your home and you’ll have the peace of mind of knowing they’re safer. There are even motorized blinds that operate using a remote control. If you’re ready to make your house a smart home, you can even purchase blinds you can operate using your smartphone.
Decorative Baby Gates
Baby gates have come a long way over the years. Manufacturers are aware that parents often set up baby gates and leave them for years. As a result, decorative baby gates have emerged that will coordinate perfectly with your existing décor. Since many of these gates have built-in doors to allow adults to easily pass through, you could put these gates in place throughout your home to keep infants and toddlers away from stairs and other areas where danger might find them. Whether you can choose from wrought iron, wood, or traditional plastic to match the area where the gate is being placed.
Outlet Caps and Covers
Outlets remain among the biggest dangers to young household members. Not only are outlets placed within easy reach of young children, they seem to hold a certain amount of interest to these family members. The problem is, if a child sticks a metal object into one of those outlets, he could be seriously injured or worse. Baby-safe outlets are largely unattractive, but a great alternative is an outlet cap. These plastic caps can be purchased in bulk and placed on your existing outlets. You’ll be able to maintain the attractiveness of your decorative outlet covers without sacrificing your family’s safety.
With so many innovators on the home design market today, there are many ways you can keep your home safe while still maintaining the look you want. If you haven’t shopped around for baby-proofing furnishings lately, you may be surprised what options are out there to help. Even if you only have young people in your house occasionally, having some of these items on hand will give you peace of mind when they come around.
https://www.thewrightteam.com/wp-content/uploads/sites/36/2022/10/article-safety-featured-103122.jpg7201280adminhttps://www.thewrightteam.com/wp-content/uploads/sites/36/2022/10/regency-trans.pngadmin2022-10-31 16:34:442022-10-31 16:34:44Easy Upgrades That Will Make Your Home Safer for Young Children
Homeowners are typically open to any efforts that will effectively help to reduce their utility bills as well as their imprint on the environment, and green roofs can help do exactly that.
Creating a “green roof” with plants can slow down and filter out rainwater runoff, which can help protect natural waters from harmful residue. Plantings on green roofs also absorb pollutants in the air to keep the environment clean.
Green roofs also help to regulate the interior temperature of a home by keeping it as much as 6 to 8 degrees cooler throughout the summer and warmer in cooler winter months, which can slash utility costs. They also tend to last approximately twice as long as a traditional roof, which means less expense and hassle of replacing a roof prematurely.
Many homeowners are also fond of the heightened esthetic appeal that a green roof covered in plantings can provide, which just adds to the mounting number of reasons why green roofs are becoming more popular among the environmentally- and budget-conscious homeowner.
A basic green roof is made of a waterproofing membrane, a root barrier, a drainage system, and a growing medium for the greenery. More elaborate green roofs are lighter and thinner and are often planted with “sedum,” or stonecrop. All sorts of different plant species can be used, including ornamental grass and colorful flowers.
They can be installed on any type of roof, even if it’s sloped. That’s because there are various ways to set up media and drainage systems to keep the green roof from shifting.
Green Roof Myths Busted
There are certain misconceptions about green roofs, namely that they are potentially leaky and a hassle to maintain. The truth is, leakages can happen with any type of roofs, whether conventional or green, and have nothing to do with the plants themselves. If the roof is leaky, it’s only because of faulty installation and an improper waterproofing layer.
In fact, some evidence shows that the plants serve as natural protection to the elements. When properly designed and installed, a green roof will include a durable root barrier that helps prevent plant roots from going too deep.
As far as its maintenance, a green roof will certainly need water on occasion during the first year, and may require weeding every few months. However, the next year it should not require any water, and after the second year, it will only need to be weeded a couple of times a year and fertilized once a year.
The Process
Before adding plants to the roof, a structural engineer will make sure the structure is strong enough to support the weight of the growing medium and plants. Each tray can add as much as 30 pounds of load per square foot when fully saturated, which can put a lot of stress a conventional roof.
The roof is then covered with a waterproofing membrane, then a layer of rubber roofing membrane is added to prevent the roots of the plants from penetrating too deep and damaging the roof. Edging is placed around the perimeter of the roof to cover the sides of the trays, then planted trays are placed in rows within the edging starting at the lowest end of the roof and moving across and up the slope.
The trays are placed carefully so that seams are eliminated to reduce fluctuations in temperature. Ideally, there should be feet built on the underside of the plant trays to keep them slightly elevated so that water runoff can flow seamlessly toward the gutters. Trays are usually cut to fit between the last full tray in a row and the edging.
How Much Does it Cost?
You can expect green roof construction and installation to start around the $15 per square foot mark for a basic system. Once you start adding more intricate greenery, increased water storage, and an increase in media depth, the cost increases from there. The slope of the roof will also impact the final price of a green roof, which can reach as much as $45 per square foot. Many city incentives and government grants are offered for homes with green roofs, which can help to cut down on the overall cost of installation.
The Bottom Line
Green roofs are becoming increasingly popular among residential properties, and aren’t just reserved for large ecological structures. Their growth in popularity comes with good reason, considering the lower utility costs, minimal impact on the earth and environment, and improved esthetics. And as long as they are designed and installed properly, there’s no reason for a green roof not to outlast any other type of roof out there.
https://www.thewrightteam.com/wp-content/uploads/sites/36/2022/10/article-green-featured-102422-cropped.jpg7201280adminhttps://www.thewrightteam.com/wp-content/uploads/sites/36/2022/10/regency-trans.pngadmin2022-10-24 14:42:582022-10-24 14:46:43What’s Involved in Building a Green Roof?
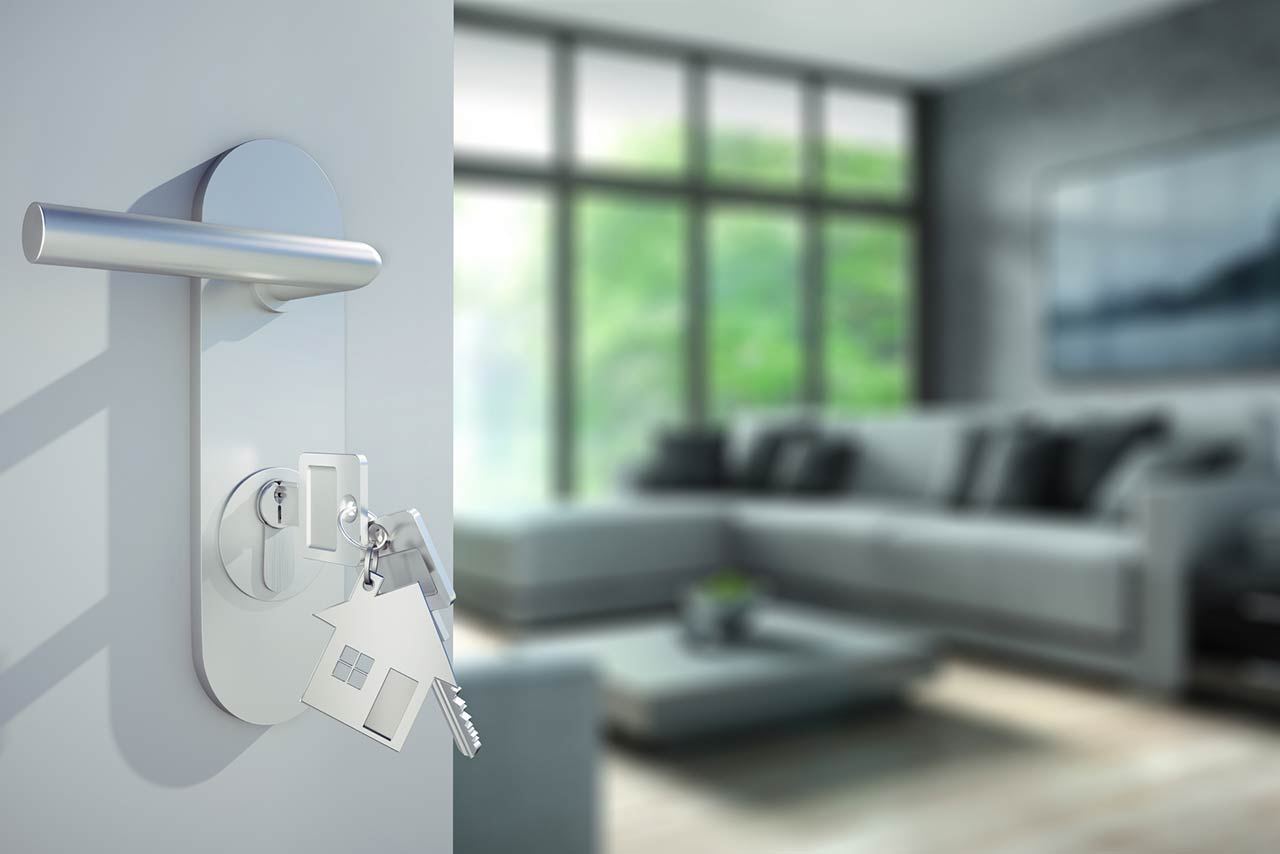
Whether you’ve got dogs, cats, hamsters, or bunnies running around at home, they’re part of the family. We love our pets, but that doesn’t mean potential buyers necessarily want to see them – or any evidence of them – when they’re scoping out your home for sale. While they’re cute and cuddly, they also smell, leave dander behind, and leave unsightly excrement and stains behind that can turn buyers off.
When it’s time to put your home on the market, you’ll need to make some changes before you can list it.
Make Any Necessary Repairs
A home with a pet is vulnerable to damage, no matter how minor. From scratches on the hardwood, to chewed-up chair legs, too scuffed up trim on the walls, pets can wreak havoc on a home. Pets might be valued members of the family, but they’re still animals, and as such, they’re likely to use just about anything in their home as a chew toy.
Before you list your home on the market and have photos taken, make sure you patch up any areas in question. Damage in the home from pets is never attractive in the eyes of buyers, so make sure you leave no stone unturned when it comes to making the necessary repairs. No matter how minor or major the repairs are and how much they cost to do, the value that you will put back into the home will be worth it when it comes to selling quickly and for more money.
Get Rid of Pet Stains and Odors
Pets have this uncanny ability to leave the scent behind, no matter how vague or potent. Even if they’ve just had a bath and are clean, they still smell. And don’t forget about litter boxes or food bowls, which carry their own unpleasant odors too. While you may have gotten used to these smells and have become “nose blind” to them, these scents still linger in the home and should be eliminated before the first buyer steps foot in it.
Don’t forget about any stains that your pet may have left behind as well, especially on your carpets. Have your floors and upholstery professionally cleaned, and make sure every stain is eliminated in problem areas. Worst case scenario: replace the carpeting altogether.
Eliminate Any Signs of the Presence of Pets
You may have gotten rid of unpleasant scents from your pets, but you also want to remove any signs that animals live in your home. Not every homebuyer is necessarily a pet lover, so you want to make sure that you appeal to as may prospective buyers as possible when you have your home on the market. That means you’ll need to get rid of litter boxes, beds, food bowls, toys, and any other remnant that points to the presence of a pet. The more clutter you can remove, the better.
Clean Up the Yard
Don’t just focus on the interior of your home when staging it to sell. Your pets likely spends a lot of time outdoors, and probably have made a mark on your yard. Buyers will probably have a quick walk around the exterior of the home to see what the outdoor lot is like, and they definitely don’t want to stumble upon any holes dug up or any excrement that you forgot to pick up. Clear the yard and patch up any areas that need repair. Once your yard is up to par, be sure to take your pet somewhere else to play and do his ‘business’.
Understand Your Liabilities
Your pet may seem to be the friendliest, gentlest animal on the planet, but you just never know if they’ll bite or scratch someone they don’t take too kindly to. If your pet ever bites someone while they are on your property, you can be held legally liable.
At the very least, check your insurance policy to see if it includes dog bite coverage. Check for any exclusions in the coverage section of your policy to see if it makes mention of dogs or any type of animal in general. Certain policies exclude specific types of dog breeds, such as Rottweilers or Pit Bulls.
Remove Pets During Showings
Your best bet is to make sure that your pets are nowhere near the property when there is a showing or an open house to avoid any complications. Having them off your property will also ensure that your home will remain in decent shape for the duration of the listing. If possible, consider having your pet stay with a family member or friend while your home is on the market.
At the very least, keep your pet in a designated and contained space and inform buyers and their agents about the presence of pets ahead of time. Your pet might not exactly like this idea, but it may be necessary when selling your home is top priority.
The Bottom Line
Pet owners love their furry friends, but pets can be a negative distraction to buyers. When you’ve got your home on the market, you don’t want your pet to be the first thing that buyers notice. Instead, be sure to eliminate all signs of animals in the house in order to make it more attractive to prospective buyers.
https://www.thewrightteam.com/wp-content/uploads/sites/36/2022/10/article-pets-featured-101622.jpg7201280adminhttps://www.thewrightteam.com/wp-content/uploads/sites/36/2022/10/regency-trans.pngadmin2022-10-16 20:33:452022-10-16 20:33:45Top Tips for Selling With Pets in Your Home
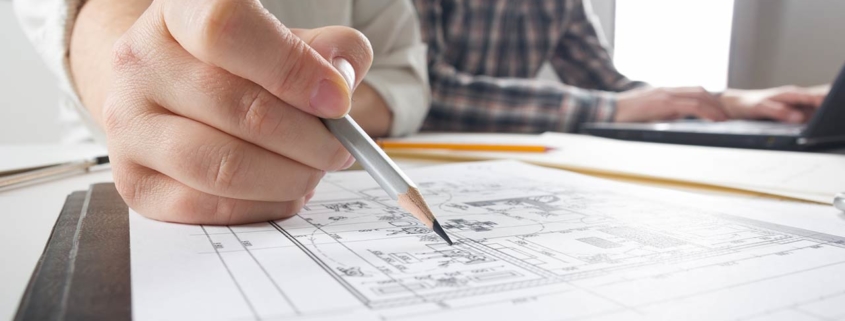
If you’ve got a new kitchen on the mind, you likely want to dive head first into the job and get it done as quickly as possible. After all, you’ve got the budget, the vision, and the desire, so all that’s really holding you back is the swing of the hammer, right?
Wrong. Like any other major home remodeling job, there’s no such thing as preparing too much. Along with proper preparations comes plenty of time to methodically plan out exactly what needs to be done, and in what order. You can’t install your sink and faucet without having your plumbing pipes installed, nor can you plant that big kitchen island in place without having your flooring laid.
Your best bet is to carry out the job out in phases. This will help ensure that no stone is left unturned, and prevent you from having to rip drywall open because of something you forgot about in early phases of the job.
The following are the stages of a typical kitchen renovation in the proper order to maximum remodeling success.
Make a Wish List
First things first. Before you even call a contractor or draft up a plan, you need to know exactly what you want. Whether it’s cabinets that reach the ceiling, a big kitchen island, or a sink facing the outside window, having your wants and needs written down is the first step in a kitchen remodel.
Figure Out Your Budget
Another no-brainer but also worth a mention is the budget. How much are you able to comfortably set aside to cover all the costs of your renovation? Be sure to come up with a figure that won’t make you house poor. Find out what the average kitchen remodeling job costs in your area, and tack on another 10% on top of that for good measure. You just never know what you’ll come across when you’re ripping out flooring and drywall, which can add more work – and money – to the job.
Hire a Contractor
This stage will take some time. After all, you want to make sure you hire the best person for the job who is experienced, honest, and understands your vision. Get estimates from at least three different kitchen specialists, and ask them a few other questions, including whether they are insured and bonded, what their experience is like, and how they expect to get paid.
Once you’ve nailed down one contractor, be sure to get a detailed estimate in writing that lists all the work to be done, how much the job is going to cost, a scheduled timeline of phases, and how change orders are dealt with. The more written details are incorporated into the estimate, the better.
Contractors will also require a deposit for good faith. Under no circumstances should the entire fee be paid upfront before any work has even started. Usually, anywhere between 10% to 50% is fair, depending on the scale of the project.
Demolition Starts
If everything in your kitchen needs to be removed in order to make room for your new kitchen, be prepared for some demolition.
Translation: a lot of elbow grease, dust, and noise. This is the point where appliances are removed, old cabinetry is demolished, and even flooring or drywall is ripped out.
Once this is done, the contractor will walk through the space and evaluate what should take place next. Detailed decisions about whether or not any corrections must be made prior to carrying on with the job will be made. However, if any issues are discovered – such as faulty wiring or termite damage – these things need to be addressed first before carrying on with the new kitchen project.
Determine Location of Light Fixtures, Electrical Outlets, and Appliances
You’re likely going to be replacing all the light fixtures in the kitchen. While you’re at it, you might have to go so far as to replace the lighting system altogether. In the meantime, you might consider adding all new appliances to give yourself a completely new kitchen from top to bottom.
As such, you may need to update your electrical wiring and panel to make sure it can support the new lighting and appliances. At this point, all the electrical outlets and appliance/light power feeds will need to be mapped out, marked, and placed.
Set-Up and Install Mechanical Systems
Installing all the technicals is typically the next step in the process, and shouldn’t take any more than a week to complete. This is the phase of the kitchen remodeling job in which all the HVAC, plumbing, and electrical are installed. If you’re including any cable and speaker wiring, this will also be installed during this phase.
Install Insulation, Drywall, and Flooring
After the set-up and installations of the mechanical systems are done and passed inspection, insulation is added between the studs on the walls, drywall is laid overtop and primed, and the flooring is installed. This needs to be done before the new cabinets are put up.
Install Cabinets and Counters
This is the part when you’ll be able to see the light at the end of the tunnel. The cabinets you’ve chosen are finally installed and fitted properly. During this phase, you’ll come to really appreciate all the time and effort that was taken to ensure that all the previous steps were done with great care and precision. The last thing you want is to notice that the floor is sloping or the outlets are in the wrong places.
Once the cabinets are in, the countertops will need to be templated, which means carefully taking measurements that are then given to the countertop fabricator. You’ll probably have to wait about a week or two before the counter is ready to be fitted. That’s because a sufficient amount of time is necessary to laser-measure the material precisely, have the shop drawings approved, and send it to the crew to prepare the slab preparation. The countertops will then be delivered and installed on your cabinets when they’re finally ready.
Final Finishing
Once your cabinets and counters are in, your new kitchen is ready to be painted in the color of choice, and all trim, backsplashes, knobs/handles, and light fixtures can be installed.
The Bottom Line
While you likely won’t be doing this major kitchen remodeling job on your own, it’s very helpful to know what steps need to be taken, and in what order. Make sure you work with a reputable contractor, get your budget in order, and take your time with the job. The average kitchen remodeling job can take anywhere between four to eight weeks to complete – don’t rush the process.
https://www.thewrightteam.com/wp-content/uploads/sites/36/2022/10/article-kitchen-featured-100922.jpg7201280adminhttps://www.thewrightteam.com/wp-content/uploads/sites/36/2022/10/regency-trans.pngadmin2022-10-09 20:03:412022-10-10 20:40:14How to Renovate Your Kitchen in the Right Sequence of Phases
Should you move or improve? That is the million dollar question.
When your family is growing, or you begin questioning whether or not those little quirks in your home are still charming, you may start to wonder whether you should move to a larger home or simply invest in renovating it.
Your home no longer fits your needs, and you can’t go on denying this fact any longer. Regardless of what these needs are, a decision needs to be made – one that is worth a ton of money.
Here is some sound advice to help you decide what route is best for you.
Find Out if You’re Legally Able to Expand
First of all, you need to make sure you’re even legally able to expand your home. Find out if the community you live in allows additions, and what the limits are on how large a house can be relative to the size of the land it sits on. If your home is already as big as it can legally be, an addition is essentially off the table.
Instead, you’ll need to work within the footprint you’ve already got, or you’ll have to relocate.
Will an Addition Make Financial Sense?
If you find out that you are legally able to expand your home, your next task is to determine whether or not such a decision is a good financial move.
Get yourself a cost estimate to find out what the price tag will be like to make the changes to your home that you have in mind. Once you’ve got that number, figure how much the addition would add to the value of your home. Then compare this new value with comparable prices of similar homes in your neighborhood. It may just be that you won’t get a decent return on your investment.
While having a larger home would certainly accommodate your needs, you don’t want to expand to the point where your home is basically the elephant on the block. You don’t want to have a home that’s twice the size of all the other homes on the street – the value simply won’t be there.
You need to strategically decide if your investment will still be worth that much a few years down the road. For instance, you don’t want to put $250,000 into your home when it won’t even be worth $200,000 in five years.
Neighborhoods can only support so much cost for a specific home. If home buyers have $400,000 to spend on a house, they’ll most likely look to an area that is made up predominantly of other $400,000 homes, instead of $250,000 homes.
Just make sure that you are bringing your home up to – or only slightly above – the standards in your area. If that’s the case, renovating just might be a great idea from a financial point of view. But if your home is already the biggest, nicest home on the block, expanding it even more probably won’t result in any payback on resale.
Make Sure the Renovation Will Boost Your Home’s Value
Whatever remodeling job you decide to pour your money into, make sure it will add value to your property. This can help offset the expense of the job you plan on taking on. Speak with a seasoned real estate agent who is experienced in buying and selling in your particular neighborhood. He or she will be able to give you pointers about what upgrades hold the most value in the are, and which ones don’t.
For instance, if most of the houses in the area are 3-bedroom homes, and yours only has 2, it would probably make sense to add that extra bedroom to bump up the value of your property. On the other hand, if the majority of the homes on the block are ranch-style bungalows, and you decide to add a second to your home, you might not be able to recoup that investment money come sale time. It simply depends on what buyers in your specific neighborhood hold value to.
Some renovation jobs bring back a sizable return on every dollar spent, while others don’t. Do the math on your particular renovation job to determine if the return on investment is a healthy one.
This is a matter of land value versus structure value. It’s the land that appreciates the most – the house not so much.
When Moving Makes More Sense
There are a ton of things you can do to your home to improve or upgrade it. But there are certain things that cannot be changed – namely, the location. Analyze the size of your land, the schools in the area, the greenery, and other factors – these are things that can’t be altered. If you can’t live with these factors, then moving probably makes the most sense.
Not being a fan of your neighborhood isn’t the only thing that might prompt you to start house hunting, either. Maybe your home was built decades ago when lead paint and asbestos were the norm in home construction. These are things you definitely don’t want to touch, especially when renovating.
And while moving might not necessarily be easier than renovating, it’s definitely a lot faster. It’s simply a matter of what would make the most financial sense for you, what would ultimately cause the least amount of stress, and what would provide you with exactly what you’re looking for.
A house, while still an investment, is really all about lifestyle first and foremost. The decision to move versus renovate is comes down to this: will your existing home – after renovated – make you and your family happy? If not, and you can afford something different, then moving might be the right decision.
Just make sure this decision is not made without the help of professionals, like a contractor, financial advisor, and real estate agent.
https://www.thewrightteam.com/wp-content/uploads/sites/36/2022/10/article-should-featured-100322.jpg7201280adminhttps://www.thewrightteam.com/wp-content/uploads/sites/36/2022/10/regency-trans.pngadmin2022-10-03 14:04:152022-10-03 14:04:15Should You Expand Your Present Home, or Move to a Larger Home?
Just because you don’t own the place you’re currently living in doesn’t mean you have to put up with boring neutral forever. While rentals can pose a number of challenges – from the ugly floors to the outdated light fixtures – there are plenty of ways that you can customize your space and really make it your own, even with stark white or barely beige walls.
Here are a few things you might want to try out that don’t require a paint brush.
Art Extravaganza
If you don’t feel like painting your walls – or have been told you’re not allowed to – there is still a way to breathe life into bare walls, including adding your favorite art work. Gallery walls are hugely popular these days, and involve grouping art pieces together by the bunch, rather than hanging just one solitary piece.
Using art makes it incredibly easy to create an accent wall, and you don’t even necessarily have to hammer nails into the wall either. Choose pieces that are lightweight, which can be easily supported using sticky strips that will never leave a hole or any other mark behind. For lots of color, use paintings and photos with tons of texture. To go the more sophisticated route, stick to abstracts and black-and-white pieces in simple frames.
Dress Your Windows
Odds are the windows in your rental unit are covered in outdated, cheap plastic blinds that are nothing more than an eye-sore. Take them down (carefully) and outfit your windows with something a little more contemporary, such as floor-length curtains or roman shades. You can replace the original blinds if and when you move out.
Just choose something that will go well with the rest of the decor in the space. Window treatments are awesome for rooms that need a little something extra, and for drawing attention away from flooring that you’re not too keen on as they help draw the eye upward.
Cover Up With Area Rugs
The easiest and fastest way to deal with scuffed up hardwood or hideously outdated linoleum flooring is to add stylish area rugs throughout the space. Even if the unit is lined with wall-to-wall carpeting, it’s still OK to pile area rugs on top. In fact, it’s a huge trend these days.
Area rugs not only help cover up unattractive floors, they also help infuse color and texture into any rental unit. Feel free to mix colors and textures together to really create a unique space.
Furnish With Modular Pieces
Consider outfitting you rental unit with modular furniture pieces that you can quickly and easily customize to adequately fit your space. For example, try adding a sectional sofa that can be split up into separate chairs or even a loveseat.
Sectionals have made quite the comeback lately, and are no longer reserved for the 1980s. Other modular furniture ideas include multi-level coffee tables, and cube-shaped shelving cubicles. These pieces are versatile, modern, and can easily fit into even the smallest of rooms.
Replace Your Light Fixtures
You don’t have to suffer staring at the outdated light fixtures that your rental unit came with. Instead, take them down, store them carefully, and replace them with more modern, attractive pieces. And don’t just limit your space with only one ceiling light fixture – instead, mix things up.
In addition to a chandelier, add other light fixtures like floor lamps, heavy table lamps, wall sconces, and pendants lamps. Mix up the shade types, width, height and metals as well to add variety.
Just because you don’t exactly own the place doesn’t mean you have to live with the way it was when the previous tenants were there. This is now your home, for however long you decide, so decorate it to your liking with these easy tips so you can enjoy every square inch, and be proud of the space you’re in.
https://www.thewrightteam.com/wp-content/uploads/sites/36/2022/09/article-rental-featured-092522.jpg7201280adminhttps://www.thewrightteam.com/wp-content/uploads/sites/36/2022/10/regency-trans.pngadmin2022-09-25 23:37:222022-09-25 23:37:22Ways to Customize Your Rental Unit Without Picking Up a Paint Brush
When it comes time to sell your home, take a close look around and see if your place has the goods that buyers are looking for. Considering the magnitude and expense of such a purchase, buyers want to fall in love with the home they plan to buy, and certain characteristics can help make that happen.
It might be worth your while to add or upgrade features in your home to help attract more buyers, and thereby draw in more offers.
Here are 6 features in a home that buyers look for before making an offer.
Open Concept Layout
Newer homes offer spacious floorplans and soaring ceilings that older homes simply don’t have. Homeowners love to be able to entertain guests and converse with them no matter where they happen to be, and parents love the idea of being able to see their kids from every angle of the living space. An open concept layout is a must-have for situations like these.
Eat-In Kitchen
Just about every buyer expects to see an eat-in kitchen when they’re searching for a new home, especially if they’ve got kids. The kitchen is the hub of the home and is much more than just a space to prepare meals. If your kitchen doesn’t currently have the space for a table and chairs, you might be able to create this space by removing a wall rather inexpensively, as long as there is no additional repair work that has to be done.
Garage Storage Space
Storage is often a huge issue for homebuyers, especially those with growing families. Of course, smart indoor storage options are critical, which include walk-in closets and oversized linen closets. However, added garage storage space is a bonus, especially when it comes to storing larger items, such as Christmas trees, lawn furniture, and large tools. This added space helps to cut down on the clutter inside the home and is just a few feet away for easy access.
Spacious Laundry Room
Homebuyers want a laundry room that’s not just conveniently located, they also want it to be spacious enough that they can do all the pre-washing, folding, and ironing all in one space. Having a space like this can help keep the mess out of your bedroom or living space, and prospective buyers will see that as a major advantage.
If you don’t currently have an existing laundry room, you don’t necessarily have to create an addition to get one. The basement is typically the easiest place to put one and can cost as little as $1,000 to create.
Hardwood Floors
Hardwood flooring offers a more modern, clean look compared to other flooring options. It’s durable, easy to maintain, and doesn’t induce allergies like carpeting can. Good quality hardwood can last a lifetime and can be easily refinished every so often to achieve a new look. Buyers have come to expect hardwood in the homes they plan to purchase, so if your home currently has dated flooring, you might want to consider installing hardwood. The cost to install 120 square feet of hardwood is approximately $1,400, which you can easily recoup come sale time.
Energy Efficiencies
Homebuyers are much more environmentally conscious these days, and anything that they can do to contribute to the health and protection of the planet is a welcomed idea. One of the most effective ways to minimize their carbon footprint on the earth is having a home that operates much more efficiently. In particular, energy efficient appliances and windows can help to significantly reduce wasted energy, and even slash utility bills. The combination of saving the planet saving money is something that just about every buyer finds extremely attractive.
When you’re thinking about selling your home, it’s helpful to understand exactly what buyers are looking for. If your home is currently not equipped with any of these highly coveted features, you might want to consider making a few upgrades to your home before listing it for sale. Done right, they could increase the value of your property and allow you to command more money when you sell. Just make sure you seek out the advice from an experienced real estate agent to make sure the changes you plan on making will bring you the return on investment you’re looking for.
https://www.thewrightteam.com/wp-content/uploads/sites/36/2022/09/article-features-featured-091922.jpg7201280adminhttps://www.thewrightteam.com/wp-content/uploads/sites/36/2022/10/regency-trans.pngadmin2022-09-19 15:31:342022-09-20 15:03:146 Features Homebuyers Will Love
Location, location, location. The phrase may have become somewhat of a cliché in the world of real estate, but it still remains the most important factor in determining the true value of a property. When you’re in the market to buy, you’re not just purchasing the physical home, but you’re also buying into the surrounding neighborhood as well.
While everyone’s got their own specific tastes and needs when it comes to the perfect neighborhood, there are certain traits that make a community an exceptional one.
Pride in Ownership
A neighborhood isn’t truly great unless there’s clear pride of ownership among all residents. How well every property is taken care of speaks volumes about what area residents think about their neighborhood and how proud they are to call it home.
If lawns are well manicured and landscaped, windows are clean, debris is cleared, and the overall street is in pristine condition, residents obviously are doing their part to keep the value of the area high.
Excellent Schools
Whether or not you have school-aged children, you still want to find out how well the local schools rank. Of course, parents obviously want their children to have access to the best schools, and many of them actually relocate specifically to be closer to these particular educational institutes.
But not only do great schools benefit parents and children, they also make the surrounding properties within the neighborhood more valuable. Buying into a neighborhood like this increases the odds that your property’s value will not only stay strong, but appreciate at a healthy rate over time.
Low Crime Rate
Turn on the news, and you’ll likely hear stories of violence and unrest in the same areas across the country. Such a scenario not only brings a feeling of insecurity and unrest among residents, it also pulls property values down.
On the other hand, a neighborhood that boasts a low crime rate allows residents to feel much more comfortable and secure. Such a scenario lends itself to higher property values, which can help you grow your home equity much faster.
Accessible Public Transportation
Having the option to take public transportation over commuting via a motor vehicle is an excellent bonus for any neighborhood. Studies have shown that the addition of a public transportation portal in a neighborhood tends to have a positive effect on surrounding property values. If you’d prefer to leave the car at home when commuting to a busy downtown core, you’ve got that option if your home is positioned close to public transportation.
High Walkability Score
Being close to restaurants, shops, markets, and other amenities is a real plus for any neighborhood. The ability to take a short walk to any of these conveniences significantly boosts the neighborhood’s walkability score, which tends to be factored in when valuing homes in an area.
Close Proximity to Medical Care
While having nearby medical facilities is a big plus for residents of any age, it’s particularly important and attractive for seniors and families with young kids. Knowing that you’ll be able to reach a doctor or hospital quickly is not only a bonus, it’s also a must-have on the lists of many homebuyers.
Green Space
There’s something to be said about being surrounded by greenery. Rather than having to drive hours out of the city in order to escape the concrete jungle, having a little bit of green space nearby can dramatically improve both the esthetics and the value of a particular neighborhood. Green space is easy on the eye, promotes a sense of serenity, and is healthier for the air we breathe.
The Bottom Line
When you’re out on a house hunting trek, be sure to have a list of neighborhood traits on your list. Don’t just get fixated on a home – make sure you consider the surrounding neighborhood that it’s located in. Not only do you want to enjoy what the area has to offer outside of your home, you also want to make sure that the property value remains intact – and preferably appreciates – over time.
https://www.thewrightteam.com/wp-content/uploads/sites/36/2022/09/article-qualities-featured-091222.jpg7201280adminhttps://www.thewrightteam.com/wp-content/uploads/sites/36/2022/10/regency-trans.pngadmin2022-09-12 14:01:492022-09-12 14:01:497 Qualities of an Excellent Neighborhood
It costs a lot of money to maintain a home, but you might be spending more than is necessary. Your utility bills can be lowered significantly by reducing the amount of energy used in your home, and doing so may be much simpler than you believe. Small adjustments here and there can add up to big savings.
Here are some easy ways you can save energy in your home that are good for the environment, and your wallet.
Replace incandescent lights
Conventional incandescent lightbulbs only convert about 10% of the energy used into light; the rest is lost in heat. Swapping these lights with more innovative LEDs can significantly cut back on energy that’s not being used for lighting purposes. Not only do LEDs use 75% less energy than incandescent bulbs, they also last about 10 times longer.
Skip the dishwasher
The amount of energy dishwashers use to heat the water and dry the dishes is significant. If you can stand it, consider washing the dishes by hand. At the very least, switch off the automatic air-dry after the final rinse and open the door open slightly to help the dishes dry faster.
Turn off electronics when not in use
All of your home’s TVs, computers, and other electronics are wasting energy when they’re left on and not being used. Plug your devices into a smart power strip that uses a lot less energy when they’re in standby mode.
Turn the temperature of your water heater down.
If you’d prefer to keep your current water heater, consider turning its temperature down to about 120°F. In addition, turn it down even lower when you’re away for a few days
Maintain your HVAC system
Your heating and air conditioning systems should be maintained at least once a year to make sure they’re working optimally and not using up more energy than necessary to operate. About 50% of the energy used in a home comes directly from these HVAC systems, so the more efficiently they function, the less energy will be wasted.
Insulate your windows and doors
Windows and doors that allow air leakage account for as much as one-third of energy loss in a home. Seal all these leaks with some caulking, and weatherstrip your windows and doors to prevent even further air loss.
Use less water and heat with your laundry
Little changes that are made when doing the laundry can save a great deal of energy. Don’t do the laundry until you’ve got a full load, and wash each load in cold water to cut back on energy used to heat the water. Once the laundry is done, hang the clothes up to air dry rather than using the dryer.
https://www.thewrightteam.com/wp-content/uploads/sites/36/2022/09/article-save-featured-090522.jpg7201280adminhttps://www.thewrightteam.com/wp-content/uploads/sites/36/2022/10/regency-trans.pngadmin2022-09-05 14:58:302022-09-05 14:58:30Simple Ways to Save Money and Energy at Home
Looking to open up your interior space to create a more spacious and functional layout? If so, you might be considering tearing down a wall or two to achieve your goal.
Sounds simple enough, but removing a wall requires some careful consideration before demolition starts. Before you grab that sledgehammer, make sure you’ve had a few crucial questions answered first.
Is it a Load Bearing Wall?
Perhaps the most important question you should ask first is whether or not the wall you intend to knock down is load bearing. If so, ripping that wall down is probably not possible.
Load bearing walls run perpendicular to the floor joists and usually are placed somewhere around the center of the home. They’re structural elements, and if you remove them, the structural integrity of your home can be seriously compromised. Your house can literally cave in if you remove a load bearing wall that was originally installed to support the structure of your home.
For this reason, you absolutely need to have a structural engineer or another professional who is well versed in the area of load bearing structures assess the situation before you decide to rip that wall down. It should also be noted that removing a wall in a single-story home is a lot different than a two-story home because of the additional stress placed on the wall from the second level. This situation certainly warrants the advice of a structural engineer.
Are There Any Wires or Pipes Inside the Wall?
Your wall is not just a couple of pieces of drywall held up with some 2x4s. There could very well be some important components inside the wall cavities that could become damaged if you’re not careful. Electrical wiring and plumbing pipes typically run through walls to get to where they need to go. There are also HVAC vents that may be lurking behind the walls that you may not be aware of.
If you start smashing into the drywall without taking the necessary precautions, you could cause some major damage to these systems that will end up costing you a lot more than you initially intended. Before you knock down a wall, verify whether or not any of these components are present, and if they are, use great care when taking the wall down.
Are There Any Toxic Materials On Or Inside the Wall?
Depending on when your home was built, it’s possible that there may be certain toxic materials on or inside your walls that warrant further inspection before the wall comes down. In particular, be on the lookout for lead paint, which is a potential problem for homes built before 1978.
If your home is older, you should consider having the surfaces tested for the presence of lead paint. If this material is present, you will have to follow specific guidelines about how to discard the old drywall and other debris that comes along with it.
Another hazardous material to look out for is asbestos, which was used in homes constructed before 1980. If there is any asbestos on your drywall, it can easily become airborne when tearing down a wall. Again, the wall should be tested for this substance, and if it is detected, it should only be removed by professionals in the business of handling asbestos.
How Will the Floors and Ceilings Be Affected?
If it’s safe to remove the wall, you’ve got a few other things to think about. Once that wall comes down, there will be an obvious blemish on the ceiling and floor where the wall was once attached. Not only will this need to be repaired, you will also have to make considerations about how to blend the two areas together so that it is not obvious that there was once a wall there.
Sometimes it can be easy to match the material and color for a seamless finish, while other times it may be necessary to completely reface the entire surface. Speak with your contractor about how to finish the area after the wall has been demolished.
The Bottom Line
Tearing a wall down offers plenty of possibilities for creating a whole new layout for your home, especially if it’s currently tight and compartmentalized. But before you start swinging that sledgehammer, there are a number of considerations that need to be made first. Get some expert advice from professionals in the industry to ensure a safe and effective job.
https://www.thewrightteam.com/wp-content/uploads/sites/36/2022/08/article-tear-down-featured-082922.jpg7201280adminhttps://www.thewrightteam.com/wp-content/uploads/sites/36/2022/10/regency-trans.pngadmin2022-08-29 14:31:522022-08-29 14:31:52What You Need to Know Before Tearing Down a Wall in Your Home